

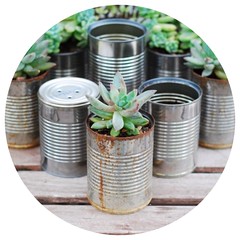
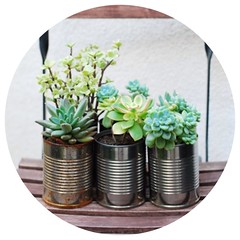
I am always looking for unique one-of-a-kind containers to display my succulents. After trying out different kind of containers, I have discovered that a simple soup can makes a suitable environment for growing succulents and it will give your garden that country rustic feel. The plus side to re-using your soup can also include the good feeling you get for being environmentally conscious, you can easily poke some holes at the bottom of the can for drainage, it is inexpensive and you'll get a meal from it. The planting process is real simple, all you have to do is eat the soup, save the can, just add dirt, some succulents, and water!
If you like the polished look then leave the can indoor on the window sill or apply a coat of rust resistant paint before putting it outdoor. If you like the rustic look then leave the can outdoor and it will weather overtime. After planting a few cans with succulents, herbs or wildflowers, you can start dressing up your garden by placing them on your patio table or hanging a few from the gazebo. They also make great centerpieces for a rustic style wedding if you mix up the size of the cans with different type of plants and flowers. Let me know if you have tried it out this weekend. I woud love to see what you have planted!
If you like the polished look then leave the can indoor on the window sill or apply a coat of rust resistant paint before putting it outdoor. If you like the rustic look then leave the can outdoor and it will weather overtime. After planting a few cans with succulents, herbs or wildflowers, you can start dressing up your garden by placing them on your patio table or hanging a few from the gazebo. They also make great centerpieces for a rustic style wedding if you mix up the size of the cans with different type of plants and flowers. Let me know if you have tried it out this weekend. I woud love to see what you have planted!
Materials:
- Soup Can
- Succulents
- Hammer and Screw Driver
- Potting Soil
Construction:
1. Rinse out the can and take off the label.
2. Take the hammer and screw driver and hammer in three holes at the bottom of the can for drainage.
3. Add potting soil to 50% of the can.
4. Add the plant and it's soil to the rest of the can. Don't forget to water so that the soils married with each other.


nice
ReplyDelete